Like any tattooing procedure, proper after-care is essential during the microblading healing process to enable you to achieve your desired final results. Microblading is a cosmetic tattooing (also called semi-permanent makeup) treatment that involves making tiny cuts along the brows and having pigment inserted into this skin, mimicking the appearance of natural eyebrow hairs. These incisions leave small wounds on the brows that will take around 30-45 days to heal. Most microblading treatments consist of an initial appointment and follow-up session approximately 6-8 weeks later. Your microblading treatment should last around 18-30 months when they are well maintained. Factors including your skin type, age and general lifestyle habits will determine the length of your healing journey and how long the results will last.
Read on to learn what to expect day-by-day after your microblading session, what to avoid and the important after-care routines to practice for optimal results.
What To Expect By Day:
The First Few Days
Don’t be alarmed if your brows look darker than you would like. The pigment on your brows appears the most vibrant immediately after your microblading session and might darken for up to 72 hours after the procedure. Expect the area to feel a bit swollen and tender. You may experience some minor redness, bruising, bleeding and oozing during this period. While unpleasant, these symptoms indicate that your skin is beginning to repair itself. Most likely, these side effects will be at their peak for the first 24 hours and taper off over the next couple of days following your treatment. On days 2 and 3, your brows may assume a slightly thicker texture (as the skin underneath gets ready to form scabs) and the pigment could appear a bit darker.
Prepare For Scabs
On around day 5, your brows enter their metamorphic stage and will begin shedding some skin before flourishing into a desirable feathery look. Between days 5-10, you will notice the top layer of skin start to scab, flake off, peel, and itch (often the most unpleasant side effect). Never scratch this skin. Giving in to this urge can open the wounds and leave you susceptible to irritation, infection and can cause premature patching or pigment fading. While patchiness and colour loss can be fixed at your follow-up appointment, allowing the itchiness to run its course – untouched – will save you time and pain in the long term.
Deceptive Disappearance
Around a week after microblading, the flaking and peeling will accelerate with the scabs that often fully cover the wounds on your brows. It is normal for the hair-like strokes and colour to either “disappear” or significantly lighten at this stage. Don’t worry if it appears that all of your technician’s diligent work has been undone. During the wound-healing process, the scabbed surface assumes a thicker texture and covers everything underneath while the ink bonds to the lower level of the epidermis (the top layer of the skin).
Once at the peeling stage, around the 10-14 day mark, the fresh layer of healed skin allows this detail work to become visible again and the colour should “return” to your initially-selected shade. After 2 weeks, you’ve made it through the most transformative and vulnerable stages of the microblading healing process.
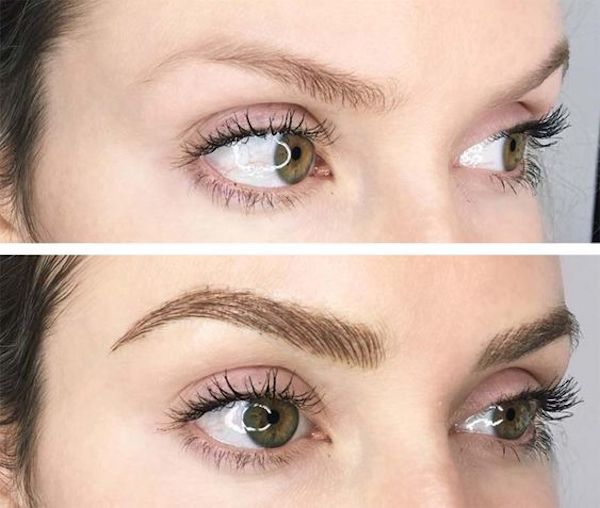
Credit: Renuka Krishna/Pinterest
The Setting Stage
During days 14-21, the pigment should be well integrated and become nearly indistinguishable from your original brows. The colour settles in while the brush strokes become more defined and blend in with your natural hairs. In the following week or two, the skin should finish recovering. At this stage, you should no longer feel any tenderness or discomfort and your brows should appear plush and full. The healing process takes around a month for most individuals and can take up to 6 weeks, depending on your skin health, habits and age.
Scheduling Your Follow-Up
To ensure that your brows and skin heal properly, you should schedule a follow-up appointment with your technician between 6-8 weeks after your initial microblading session. This appointment should be considerably shorter than your first booking, as long as you followed all of the outlined after-care protocols and can be used to fix any patchiness or misshapen areas. Give your brows this extra 2-week grace period to ensure they fully recover, especially if you think you might need a touch-up.
If you believe that your brows are not healing properly, though, don’t hesitate to consult your expert at any point before this timeframe.
Best After-Care Practices:

Keeping the area clean and hydrated is essential during the microblading healing process. Around 2 hours after your initial microblading appointment, take a fresh cotton swab and gently wash the area with sterilized water. Excess ink, blood or ooze will probably come off during this cleaning to ensure that the brows remain bacteria-free. Your freshly tattooed brows are most prone to infection during the first week, so it is crucial to follow recommended hygiene practices consistently during this period.
Apply mild anti-bacterial soap to the area in the morning and at night with room temperature water using a cotton pad or ball. After cleansing, gently pat the area dry with a fresh paper towel or cloth. Always make sure to wash your hands thoroughly before touching your newly-inked brows to prevent potential infection.
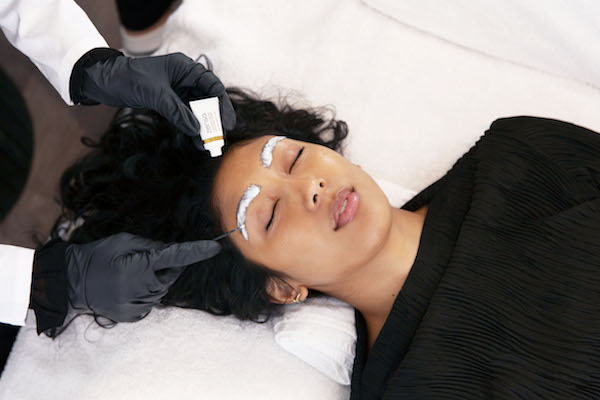
Once completely dry, follow up your washing routine and hydrate your brows with an after-care balm. Apply a thin layer of a moisturizing product, like Healing Cream, to the area up to three times a day.
Using a nourishing balm specifically designed to aid in the tattoo and semi-permanent makeup healing process soothes the area, reduces itching, redness and minimizes scarring once scabs start to form. Zensa Healing Cream is vegan, cruelty-free and steroid-free. One of the product’s main ingredients is sunflower seed oil, which won’t impede ink settling and helps to maintain the ink’s vibrant hue. It contains cucumber and shea butter to calm and hydrate the area with calendula and grapefruit seed oils to reduce irritation and promote healing.
While these are general guidelines, always make sure to carefully follow all of your technician’s after-care instructions. Make sure to clarify any steps or best practices if you have any questions. If you have oily skin, consult with your technician or dermatologist on how often you should use an after-care cream on your brows during this period of the microblading healing process (scroll down for more information on this subject).
What To Avoid:
Staying dry and out of the sun is essential for the first 10-14 days after microblading. Avoid swimming and sweat-promoting activities, including exercise, saunas, and steamy showers during this timeframe. Do not expose the area to excess moisture and hot water. This practice encourages your skin’s pores to open up and creates a breeding ground for bacterial, fungal and other microbial infections.
For the first 2 weeks, do not apply make-up or use chemical-containing skincare (especially those containing retinol or glycolic acid) and laundry products that could come in contact with the area. Be careful when washing your face and hair. Try to refrain from washing your hair for the first 2-3 days after microblading. Avoid getting any products or water on your brows when showering for at least the first 10 days.
Sleep on a fresh pillowcase on the night following your microblading session. Be particularly mindful to remember to change and use clean sheets and towels during this period– wash them with fragrance-free products if you can.
After 14 days, you can re-incorporate all of the activities mentioned above into your routine. However, you will want to continue refraining from using any products that contain retinol or glycolic acid and do not schedule any chemical peels or laser treatments until after your follow-up session.
Microblading FAQs:
How much does microblading cost?
Microblading services will cost between approximately $500-$2,000, with both sessions typically included. The cost of your microblading experience depends on your artist’s location, experience and expertise level.
How long do microblading sessions take?
Between your consultation and the procedure (around 60 minutes), your initial microblading session will take approximately 2-3 hours from start to finish. Your follow-up session should take around an hour or less.
Are there any extra precautions I should take before microblading?
It is advised not to receive any botox, laser or waxing treatments for around 3-4 weeks before your appointment. Avoid using retinol and Vitamin A-containing skincare or booking a facial within two weeks, tweezing your eyebrows within the week, exposing your skin to direct sunlight, tanning and consuming caffeine, alcohol, aspirin, ibuprofen or fish oil supplements in the 48-72 hours before microblading.
Will microblading hurt?
Most technicians use a numbing cream, like Numbing Cream, to keep the pain to a minimum. When a numbing cream is applied as directed (30-45 minutes before the procedure), you should feel relatively little to no pain. Most likely, you will hear and feel a slight scratching sensation as the needles puncture your skin. Even if the sound is unsettling, remember that it is normal during a microblading treatment.
How can I prolong the time between my sessions?
Stay out of the sun and refrain from using harsh exfoliating products to increase the longevity of your brow treatment between touch-ups. In addition to lifestyle habits, those with oily skin often need more frequent touch-ups (usually closer to every 12 months) than individuals with drier skin types (typically around 18 months or more).
Who is not a suitable candidate for microblading?
Individuals with botox or visible redness on their brows, who are pregnant and nursing, have autoimmune diseases, HIV or undergoing chemotherapy treatments are not eligible for microblading.
You also should avoid microblading if you have a thinner skin texture, recurring acne, eczema or any similar skin condition. If you have very oily skin, nano brows might be a better option for you than microblading. Unlike microblading, nano brows are a semi-permanent tattooing treatment that uses an ultra-slender, flexible single nanoneedle tool to inject pigment into and create strokes that are nearly indistinguishable from your natural hairs. Nano brow treatments tend to require less regular maintenance and wear better between touch-ups.
No comment