If you’re keen on keeping up with the latest beauty trends, you’ve probably heard of lip blushing. This permanent makeup procedure is like microblading, but for your lips. Often recommended as an alternative to fillers, lip blushing combines traditional tattooing techniques with semi-permanent ink to provide better lip definition. This permanent makeup treatment creates the illusion of fuller lips, conceals hyperpigmentation and offers a subtle wash of colour (that will make you question whether you need to wear lipstick daily or ever again, really). While (somewhat) temporary, you need to treat your lip blushing experience like any tattoo. It is important to properly prepare, learn about the appointment experience and know what to expect before and after lip blushing.
We’ve gathered the top FAQs about lip blushing and did extensive research to create a comprehensive guide to share all of the answers in one place.
Read on to learn everything you want to know about lip blushing, from how long it lasts, the cost of an appointment and selecting the right pigment colour, to what to expect before and after lip blushing, the healing process and the best lip blushing after-care practices.
What is lip blushing?
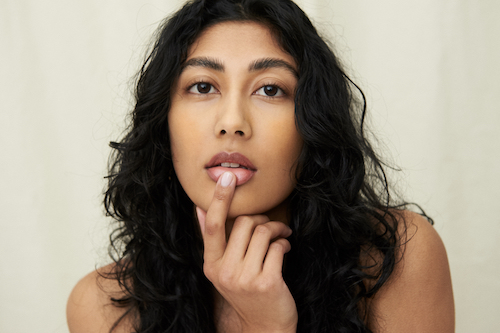
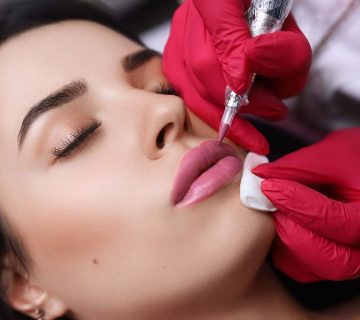
Lip blushing (also known as a lip blushing tattoo) is a permanent makeup treatment that involves injecting pigment into the lips with a single mechanical needle. Unlike old-school (permanent and opaque) lip tattooing methods, lip blushing is semi-permanent and offers a subtle wash of colour. Modern lip blushing injects pigment into the epidermis (top layer of the skin) using a quick hand motion and dotting method, similar to whip-shading or pepper-shading techniques seen in traditional tattooing. Lip blushing can be used to correct the shape or even out the tone of your lips. This permanent makeup procedure offers a natural-looking way to minimize the appearance of scars or aging on the lips. Lip blushing also allows you to wake up with a ‘your lips but better’ look that lasts throughout the day and doesn’t require regular cosmetic touch-ups. However, you can always apply lipstick or gloss over your lip blushing tattoo once it’s fully healed.
How long does lip blushing last?
Lip blushing treatments typically last between 2-3 years without any touch-ups. Factors such as your skin type, genetics, lifestyle habits and adherence to proper after-care practices affect the lifespan of your lip tattoo. Oily skin types, a vitamin D deficiency, frequent exfoliation, sun exposure (especially without SPF protection) and smoking can all cause premature fading. Always apply lip balm with SPF 30 before going outside to keep the pigment vibrant and extend the life of your lip blushing tattoo.
Does lip blushing make your lip look bigger?
Lip blushing can give the illusion of fuller lips. The permanent makeup treatment helps define your lip shape and adds a glossy finish that often makes the lips appear bigger. However, unlike lip fillers, lip blushing doesn’t add any material volume to the area. Lip blushing is perfect for adding a subtle and naturally fuller look to your lips.
Consider combining your lip blushing tattoo with a lip filler treatment to add some pigment while significantly enhancing the size of your pout. If trying out lip filler first, wait at least 6 months before lip blushing. Otherwise, it is best to start with your lip blushing treatment. Schedule your next lip filler appointment at least 2 weeks after lip blushing. To better understand the difference between these, we covered everything you need to know about lip blushing vs. lip fillers to help you decide which is best for you.
How much does lip blushing cost?
The average lip blushing tattoo costs anywhere from $500 – $1,500. The cost of lip blushing varies greatly depending on the studio, its location, your artist’s expertise level and how much pigment is needed to achieve your desired pout. Touch-up fees can range from an additional $150 to a few hundred dollars.
Lip blushing is a bit pricey. However, like any permanent makeup procedure, you typically get what you pay for. No budget option is worth a bad lip blushing tattoo that lasts for years on your face. Consider your lip blushing treatment as a long-term investment. Save up and wait until you can comfortably afford a high-quality experience. In the interim, you can always experiment with different lip cosmetics to discover your ideal pigment shade well ahead of your session.
What should you know before and after lip blushing?
Proper preparation is essential for a successful lip blushing session. Do your research on the permanent makeup studios in your area. Read reviews carefully. If possible, take an artist recommendation or referral from someone you trust. Experiment with different lipstick and gloss colours beforehand, so you can best communicate your shade preferences to your artist. Bring inspiration photos or your favourite product to your appointment, if possible, so your artist can find comparable pigment colours during the consultation. The entire lip blushing session should take 60-90 minutes, including the consultation and permanent makeup procedure.
In the few days leading up to your lip blushing session, routinely exfoliate and hydrate your lips. Use a lip scrub (either store-bought or DIY sugar scrub) and a moisturizing balm daily. Having a smooth pout when you walk into your lip blushing appointment enables the pigment to appear vibrant and distribute evenly. Lip blushing also dries out the lips, so removing dry patches and diligently moisturizing your lips reduces complications during the healing process, such as cracked skin, infection or patchy pigmentation. Avoid alcohol for the last 24 hours before your appointment to further prevent skin dehydration. Drink plenty of water to support your skin’s moisture levels.
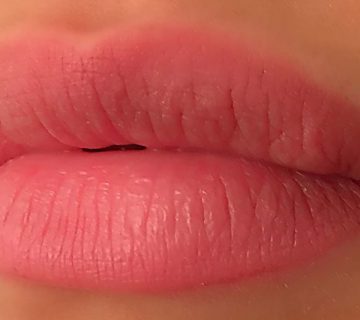
The pigment colour will be its brightest immediately after your lip blushing session is completed. The fully-healed shade will be between 30-50% less intense than this initial hue, so don’t be alarmed if your lip colour looks more vibrant than you expected. Lip blushing tattoos take around 4 weeks to fully heal. However, the first 10-14 days of the lip blushing healing process are the most critical (scroll down to learn more on the lip blushing healing process).
Credit: @drgerstmannyc/Instagram
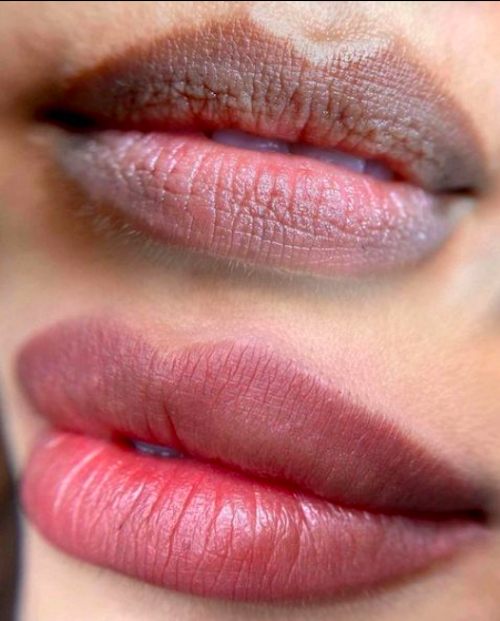
Which lip blushing colours should I consider?
When exploring potential shade options, identify your skin’s shade and undertones. Your skin shade (or tone) refers to the pigment (type, size and distribution of melanin) of your complexion. While everyone’s skin tone is unique, most individuals can categorize their complexion in one of these broader categories: pale, olive, Asian and dark skin tones.
Determining your skin undertones is equally (or even more) important when seeking to find your perfect lip blushing shade. You can often find your skin’s undertone by looking at the veins on your wrist. If your veins appear blue, your skin has pink or cool undertones. If your veins look green, you have yellow or warm undertones. If you have bluish-green veins, you probably have a neutral skin undertone (a balance of warm and cool undertones). Another way to find your skin’s undertone is through the jewelry test. If gold jewelry is more flattering on your complexion, chances are you have warm skin undertones. If you prefer silver jewelry, you likely have cool undertones. If you have neutral undertones, you will probably find gold and silver jewelry equally flattering.
Individuals with warm undertones will find orange or golden-based lip blushing pigments to be the most flattering, while those with cool undertones typically look best in blue or purple-based lip blushing shades. Darker skin tones often find deeper hues that complement their undertones to be the most flattering and vice versa.
For a more in-depth guide, here are our 5 easy steps to help you choose your perfect lip blushing colour.
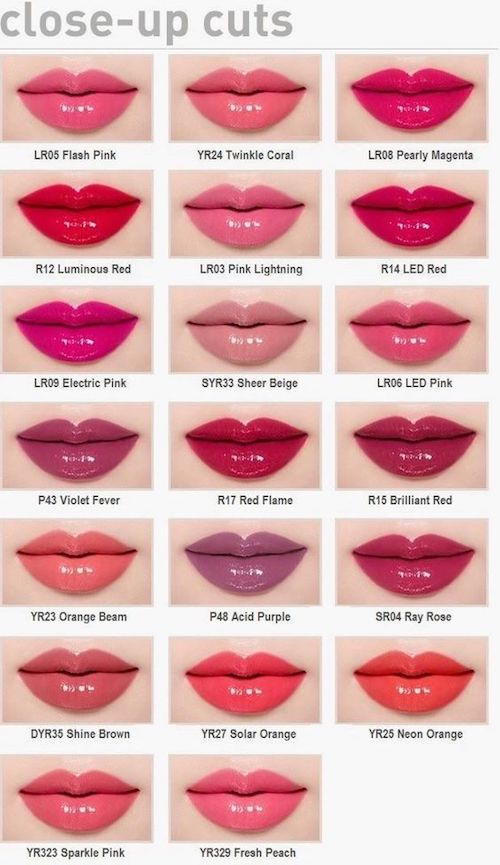
Credit: Farah/Le Maquillage/Pinterest
How does lip blushing differ when done on darker lips?
Lip blushing is a more extensive process if you have a darker complexion. A more melanin-rich pout has a darker blue or purple tint, which hinders pigment colour from showing up accurately on your natural lips. A micropigmentation technique called lip neutralization is used to balance out the skin’s undertones and lighten your lips. Lip neutralization, a form of lip blushing, uses an orange-based pigment to even out the undertones, eliminate dark spots and slightly lighten your lip shade. One to two lip neutralization sessions are needed for the best results. While you can do lip neutralization alone, it is often done as a prerequisite to a normal lip blushing procedure. The healing process for a lip neutralization tattoo is similar to that of a standard lip blushing tattoo (around 10-14 days to initially heal and up to 6-8 weeks to fully heal).
Credit: @esteticapmu via @zensaskin/Instagram
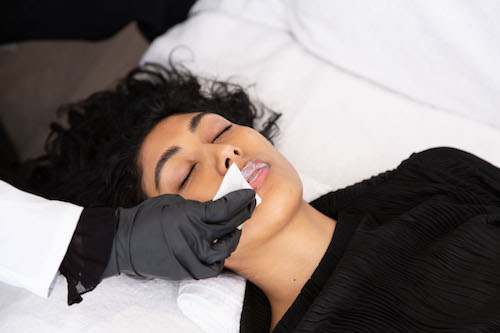
Does lip blushing hurt?
The lips are a naturally sensitive area, so it is normal to worry whether lip blushing will hurt. Fortunately, your artist will apply a topical numbing cream, like Numbing Cream, to significantly reduce the pain. Zensa Numbing Cream features 5% lidocaine for maximum strength pain relief with a natural pH formulation that caters to sensitive areas, including the lips, and does not contain any vasoconstrictors that prevent the ink from properly settling. The numbing cream is left on the lips for approximately 20 minutes before the procedure begins. With the numbing cream, your lip blushing treatment should include minimal pain. Many clients describe the lip blushing procedure as a series of light scratches or small pinches. Everyone’s pain tolerance is different, so don’t be alarmed if you feel a moderate amount of pain at certain moments. However, severe pain is a red flag that something isn’t right. Let your artist know immediately if the procedure starts truly hurting. Speak up if you’re concerned. You don’t want a ‘lip blushing gone wrong’ experience.
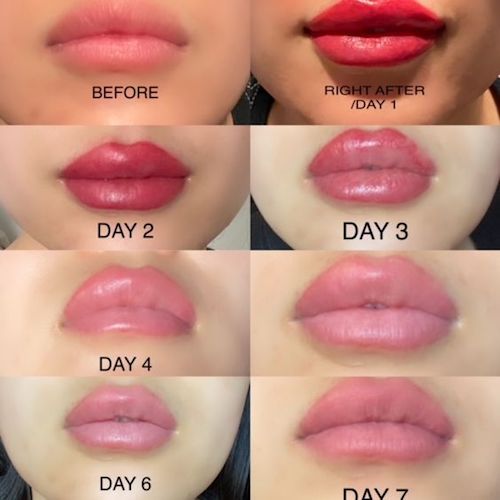
What does the lip blushing healing process look like?
The entire lip blushing healing process takes 4-6 weeks. However, the top layer of skin should finish healing within 7-10 days after your lip blushing treatment. For the first 24 hours, expect the pigment to be incredibly vibrant. Lip blushing creates micro-wounds on the skin, which triggers your body’s inflammatory response. This process leaves lips fairly swollen and produces lymphatic fluid. Around 4-6 hours after your lip blushing session, gently dab this fluid off your lips with a fresh paper towel and lukewarm water. Follow up this step by applying a hydrating ointment (like Aquaphor) or a tattoo lotion, like Zensa Healing Cream.
Zensa Healing Cream contains medicinal-grade calendula oil and grapefruit essential oil, which help reduce inflammation, accelerate wound-healing and hydrate your lip blushing tattoo throughout the healing process. Our formula also contains sunflower seed oil to keep the pigment bright without impeding ink settling.
Wash your freshly-inked lips with water and a fragrance-free cleanser daily for the first 10 days after lip blushing. Complete your after-care routine with your approved moisturizer, such as Healing Cream. Apply a thin layer of this hydrating product as needed for (at least) the first 2 weeks.
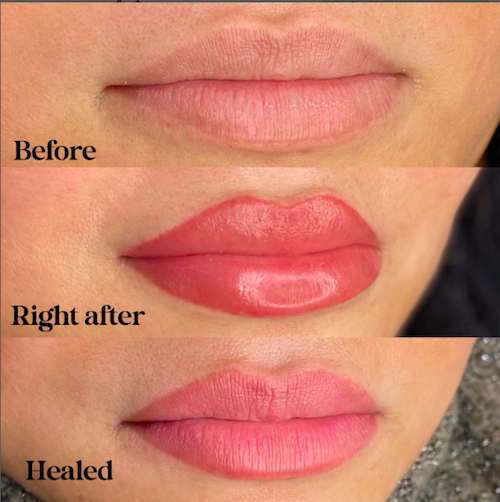
After 2-3 days into the healing process, the swelling and pigment vibrancy should start to go down. By days 3-4, your lip blushing tattoo will begin peeling as the scabs start to fall off to unveil a healthy, healed layer of skin. The peeling stage should last up to around day 6-7 after lip blushing. By day 7, the pigment’s vibrancy should diminish by around 30–50% from its initial look right after your lip blushing session. After 10-14 days, your lip blushing tattoo should be healed on the surface level. However, you might see that the pigment colour will ‘disappear’ at this stage before your lip tattoo fully heals. As the skin continues to heal, the scabs thicken and temporarily conceal the ink. The lip tattoo’s colour should ‘return’ within 4-6 weeks once the lower layers of skin fully heal.
After 8 weeks, schedule a follow-up appointment, so your artist can ensure your lips healed properly and pigmentation can be touched-up to perfect your lip blushing for the next couple of years.
Credit: Glo Med Spa Austin/Pinterest
What are the side effects of lip blushing?
Some minor, normal side effects include:
- Swelling
- Redness
- Dryness
- Minor Bleeding
- Mild Soreness or Pain
Side effects of improper after-care practices after lip blushing include:
- Rash
- Scarring
- Infection
- Itchiness
- Uneven Pigment Distribution
- Excessive Swelling
- Oozing
- Fever or Chills (Seek medical attention immediately)
What should I avoid after lip blushing?
- Spicy Foods, Hot Beverages, Alcohol (for at least 48 hours)
- Intense Exercise, Kissing, Saunas, Swimming, Sweating or Friction-Causing Activities (for 2 weeks)
- Direct Sun Exposure, Laser Treatments, Chemical Peels, Lip Exfoliators or Cosmetics (for 2 weeks)
Is lip blushing worth it? What are the pros and cons?
Whether lip blushing is worth it depends on your personal cosmetic preferences, lifestyle, budget and pain tolerance. Lip blushing offers a low-maintenance way to wake up with a polished pout for up to 3 years. You likely won’t have to bother with lipstick or any coloured lip cosmetics daily, which saves time and any hassle between meals or meetings. However, lip blushing requires a high upfront investment – from the cost of the lip blushing services to the consistency of after-care necessary for skin health and a perfectly-pigmented pout.
Benefits of Lip Blushing:
- Long-Lasting Colour
- Provides Naturally Fuller and Evenly-Pigmented Lips
- Low Maintenance Over The Long Term
- Eliminates Daily Need For Lip Cosmetics
Cons of Lip Blushing:
- Expensive Treatment Costs
- Intense After-care For The First Month
- Risk of Pain or Infection
- Consistent SPF Protection Needed Over The Years
No comment